Friday, March 4, 2011

Architectural Upgrades

Here is a list of the other upgrades we are going with…

1)Fully insulating the garage
2)Moving the basement window from the back of the house to the left side
3)Adding a side door to the mudroom
4)Moved the dishwasher to beside the sink
5)Sound proofing the laundry room
6)Switched up the laundry room and added extra space to the walk-in closet

Here is what its going to look like:


The only one thing I am now thinking about it that there is a lot of doors in that one section of the hall as our master has double doors that will be to the right of the laundry. Hubs and I figure if it is too doory we can always switch up the master after the fact – closing in the sides and making one wider door. I guess we will see in 8 months!

Master Bath Part II

I think I have kept anyone who is interested in suspense long enough. We got the pricing back for the master bathroom! Here is a break down….

1)Making the tub smaller and moving it to its new location $200
2)Shower with the Kalia base, custom glass on two walls and ceramic on 2 walls, moved to new location $4900
3)The Camil Tomlin Flow shower, moved to new location $2800
4)Standard shower with Klera doors, moved to new location $400
5)Double Vanity with bank of drawers $1200

We decided on….drum roll please….options 1, 2 and 5!!! YES I am getting the custom shower!!! I think the new bathroom is going to rock!! There is no way we could have redone the bathroom for $6300 after the fact so thank you builder for pricing it right!!

We are still working out the colour choices. I am not sure what route we want to go. I found a really nice white tile with a fine grey strip running through it – I was thinking that on the floor with a white tile on the tub surround, a brown/black or black coloured vanity with a white counter and then a dark charcoal colour on the walls of the shower. It sounds like a mish-mash though…

I think I should just go with this....


…hubby might object though!

I’ll keep you posted on the colour choices. If anyone has any advice, or pictures they want to share, let me know, i would love to see them for inspiration!!

Sunday, February 27, 2011

SOLD!

As I write the word, I am still in disbelief. It has been quite a month! I will start at the beginning with the first piece of news…the house is SOLD!!! That’s right, come June 24th we will no longer own the little brown house. What is most interesting about this piece of news is that it wasn’t even for sale. That’s right. NOT.FOR.SALE. Not on grapevine, or with an agent, nowhere near being on the market. In fact, the day before all this came to light, I was preparing to blog about our stager and our staging process. (I will still do this; I just won’t have any insight as to whether or not it worked for us because we didn’t get that far in the process!)

So how does this happen? I give credit to the wonderful world of social networking. I frequent (and I use that term lightly as I have not been on in almost a month) a web site called www.buildinghomes.ca It’s a resource for those building new construction homes in Canada. There is a message board specifically for those building homes in Ottawa and someone was asking questions about our area, and mentioned how they liked the same model as we have but didn’t like where the builder was currently building. So I piped in with my 2 cents – “Hey we are putting ours on the market in a couple of months, let me know if you would like more details” sure enough, they messaged me back almost immediately interested in our place. My son and i were going out of town that weekend (and Brian was sick) so we put off the viewing until the next weekend. And then it started: they came, they saw, we negotiated, we agreed, they inspected, and we’re sold! I make it sound a lot quicker and a lot less stressful - all that probably took a good and very busy month.

Oh yes and before I forget (haha – kidding) the second piece of news is…I am expecting!!! Our second baby is due August 14th (thank GOD its not anywhere near our closing date!) This is the other reason I have been delinquent with my postings – I’ve been absolutely exhausted (and sick but that’s another story).

The third bit of news relates to the new house’s master ensuite, but I will post that in another post!

Monday, January 24, 2011

The Master Bath

I am not a fan of the master bath as it designed in our new house.


My 2 main reasons:
1) too much of the floor space is taken up by a massive corner tub. Neither me nor my husband are bath people. The massive tub we have right now has only been used once, by my son when I got the bright idea he should have a bath in there. It took about 20 mins for it to fill his usual amount of water (about 3”) and of course it was cold by the time he got in it. As well, the side of the tub is too high for me to reach over. It was not a pleasant experience for either of us.
2) We cant get a double vanity in there without upgrading the shower. We had sort of already planned on upgrading the shower but I don’t want the vanity to butt up against the expensive glass wall, it kind of defeats the purpose.

I have talked to a few people on the tub situation, because I feel like if I could solve that, it would make things easier. One main question was raised like: do you really need a tub? My rebuttle: Is it going to affect resale? Which got me thinking, do you really need a tub in an ensuite if you have a tub in another bathroom? Some said yes, some said no. We kicked around the idea of having one massive luxury shower with a couple of shower heads, and body sprays. We also thought about having a stand alone tub. Unfortunately I think a stand alone tub needs to be seen – it’s a thing of beauty after all. In the end there was no place in the bathroom we could logically put it for it to be seen.

In the end I went to our builder’s supplier and talked to one of the associates there. She was helpful in coming up with a plan maximize the space in the bathroom. I was also able to pick out a couple of options for the shower.

1) a Kalia base (which is a solid surface base that looks way nicer than its acrylic counter part) 2 custom glass walls and 2 tiled walls
2) the Camel/Tomlin Flow shower


The re-design is more of a reconfigure. We went with a smaller tub and switched the shower and vanity. Check it out:


We will now wait until we get pricing to make our decision. Although I am sure that we have already exceeded our budget for this room just in these changes alone. For fun, here is my order of preference*:

1) Bathroom reconfiguration with all standard options.
2) Double vanity
3) Awesome shower
4) Upgrade the tile
5) Upgrade the vanity colour

*Note: these are today’s preferences….LOL

Keep your fingers crossed for us!

Wednesday, December 29, 2010

We did it!!

It has been just over a week, and I am still in a state of disbelief! We bought a house!! It’s another new construction, but the same builder that built our current place. It’s in a different neighbourhood though, in the west of the city, Stittsville to be exact. I am not sure about most people when they move, but this is not a decision we took lightly. We did our research, found the lot, put a deposit down and then backed out because we still weren’t sure. We then spent the next several months, going to open houses (3 months x 4 weekends/month x 5 houses average per weekend = 60 houses) Some we visited twice or three times (not included in that count). But nothing ever compared to this place. So why not just get it then…well two main reasons factored into this doubt: 1) Its far 2) it’s close to the dump.

Its far....

When we were telling our family and close friends the happy news, a couple of them immediately shot it down saying: “Stittsville eh?...wow… that’s… far” or “Rush Hour traffic is going to be hell” and my personal favourite: “I hope you don’t expect me to visit you ALL THE WAY out there” . Whoa – I didn’t know we were moving to Mars. I guess that is a few less people that we will have to invite to our house warming party! It’s not really that far – from Blackburn Hamlet it is about 36 minutes door to door. To put that in perspective, it’s about 28 minutes from there to our current place. Yes the distance is greater, but the streets you drive on are faster. So it evens out. We have actually timed the drive, and it’s true, it is just 36 minutes (we played fair and went the speed limit too) While it is far from some, it is close to a lot more. There are grocery stores, shops and restaurants within walking distance. We have lots of family and friends who live in the area so if we need help with the little one, its just short drive away. This is HUGE for us. If I am late from work one day, I can get help rather than stressing about it until I get to the daycare and then having to pay late fees – I never wanted to be that parent. It will also be nice for our son to grow up closer to his cousin. We might even be able to look into a nanny share!!

Its close to the dump....

Yes it is. I don’t know what else to say here. This is something we were really worried about in the beginning. It’s the reason we pulled the plug the first time around. But after talking to some neighbours and my dad doing some research on the wind patterns, we hope it won’t be too big of an issue.

While it kind of sounds like I am trying to justify our decision to move, I am not. We are really happy and excited!!! And those who don’t think it’s a good idea: butt out and be happy for us!!

The house will be in the north-western corner of the subdivision. It is a little pocket of about 20 homes. You have a cross over a bridge and through a bit of forest to get there. Our place currently backs onto a lot of 6 acres that is for sale and is zoned residential. But word on the street is that the price is too high and therefore unusable for developers. So for now we back on to a forest. It’s a bit of country in the city!!! The house will look like this:

Sunday, December 19, 2010

Ok...i am back.....

So I was at a Christmas party this weekend and my girlfriends were asking about my blog. Why I haven't been writing anything lately - I guess it’s because I really didn’t have anything to say.
I have been busy adjusting to my new life, a mom, wife and homeowner that lives in the 'burbs (if you can call it that, I prefer the middle of nowhere). It hasn’t been a particularly hard adjustment, just one where there seems to be no time for anything except that.
I can tell you, that I am going to try to make more time for blogging as 2011 will bring with it a lot of changes. They are big ones - I know, I have insider knowledge! Stay tuned, I will hopefully be able to write about the first one on Wednesday!

Monday, April 19, 2010

DIY on the Road

I took a break this weekend to help my sister with her nursery. She is expecting a baby boy in July!

She had painted the room green but felt the room was a bit plain.

The room before its transformation:
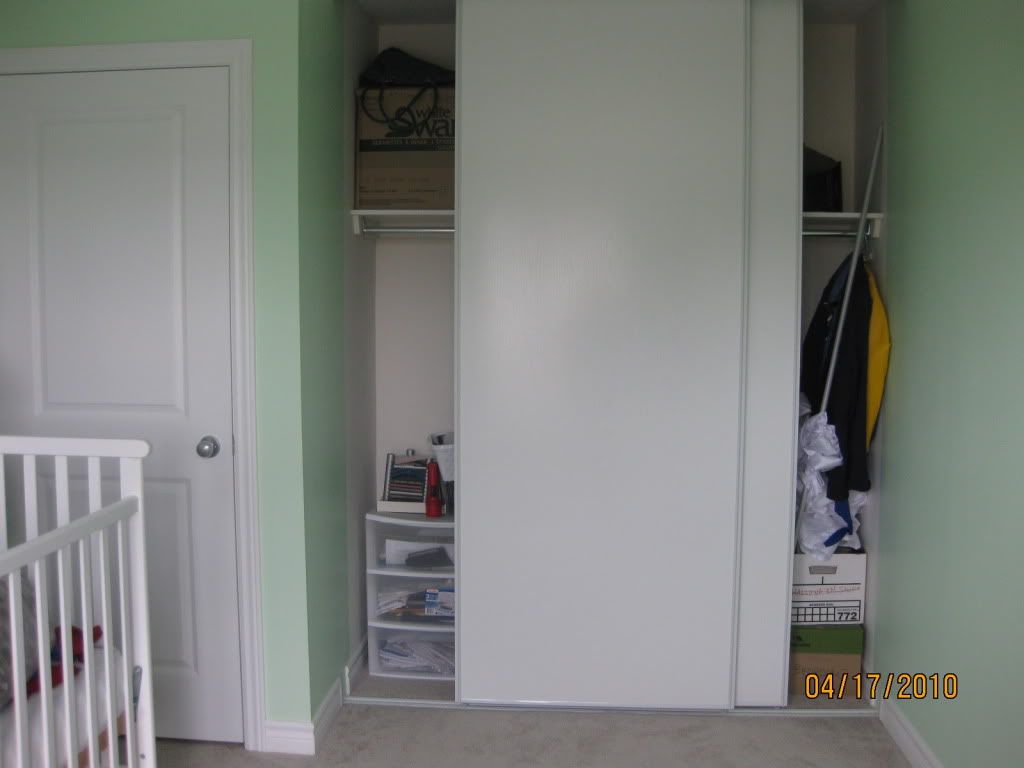
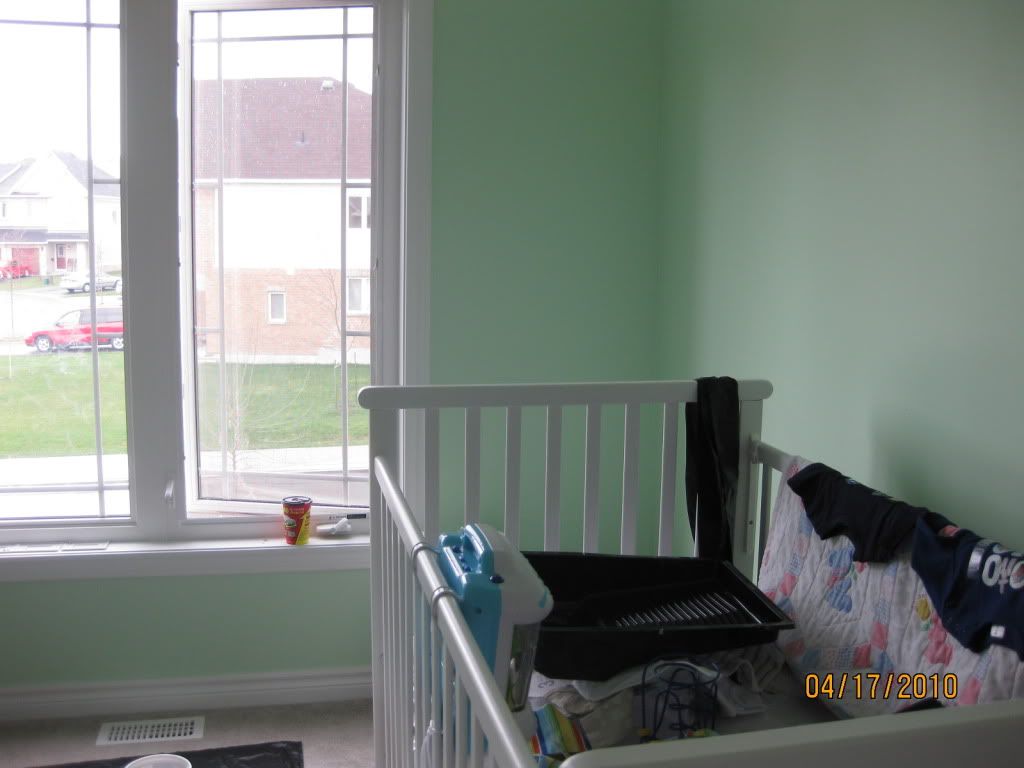
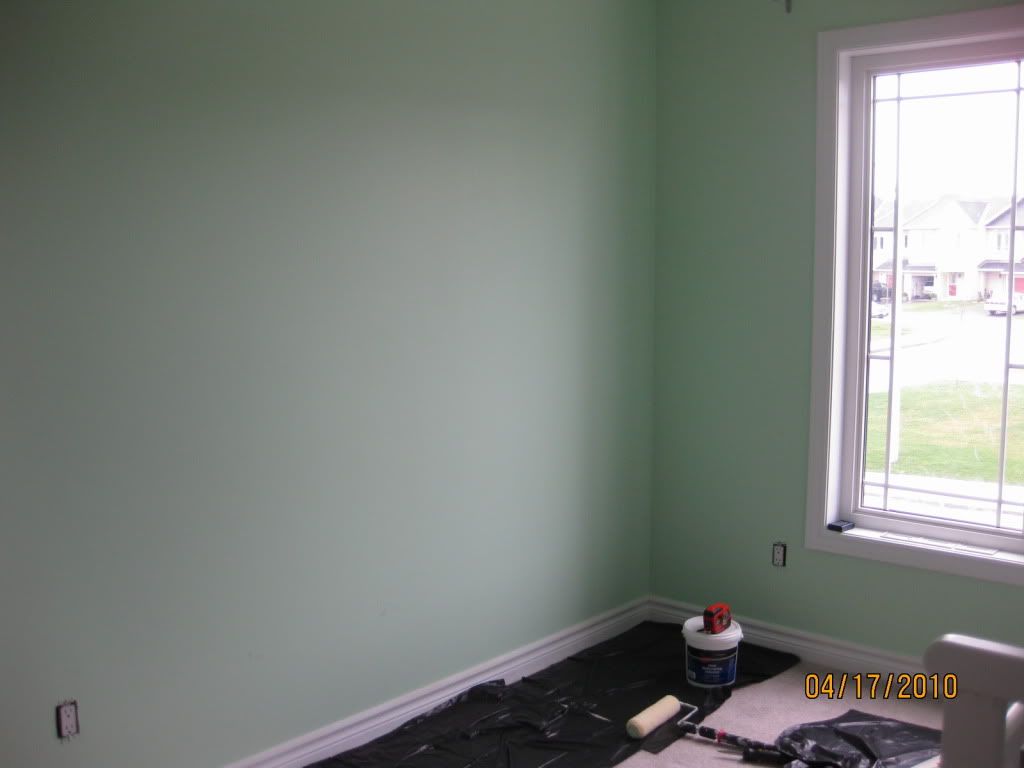
Photobucket

Photobucket

Photobucket


Our Mission….

She and I tossed around a few ideas but she really wanted to do wainscoting. So again we tossed around ideas for how to do it – whether we go with just a simple chair moulding and add in some trimmed out squares or rectangles below, or if we attempt something a bit more complicated and go with MDF strips to create a square pattern. She really liked the idea of beadboard, but what a pain to have to glue it to your walls. What if Baby R decided when he was 5 that he wanted to have something different?? It would be a nightmare trying to take it off. I know I had visions of having to re-drywall. Not fun and not to mention expensive too. So we kind of stalled for a couple of weeks until last weekend when we got the “DreamBook” from Home Depot. I was flipping through dreaming about my new deck and re-doing our master bath for the umpteenth time, when I came across Martha Stewart’s new line of paintable wall coverings (item #6 in the colour by numbers section of the “Dreambook”). I know what you are thinking: You’re crazy. My grandma used a paintable wallpaper in her kitchen to make it look like she had tiles back there. That stuff is uuuuugly! I was thinking that too. But we missed two key words: Martha and Stewart. It HAS to be a "Good Thing", right???


DIY Coles Notes Version

This paintable wall paper is easily installed, you put the adhesive on the wall and slap on the paper. Add a trim to finish off the edge. And then paint it out. It is really as easy as it sounds.


DIY Tips for the project

- We used a laser level to mark the height of the bottom of the trim and added 1”. This measurement became the length we cut the paper strips.
- We used one of those “completely useless for painting” edger painting pads (the kind that are supposed to make painting along the ceiling and around baseboards sooo easy) to apply the adhesive.
- Use a good sharp exacto knife to cut the paper off along the baseboard and around windows etc. You will know when it’s time to snap off the blade because it will shred the paper instead of giving a nice clean cut.
- Use a chair railing trim or for a thicker look, we used a casing
- After the trim is up, if any of the paper shows above the trim, use a SHARP exacto knife to trim it away
- caulk the top and corners of the trim for a more professional look
o Here’s how we did it:
~ We put a bead of caulking along the top edge of the new moulding
~ I ran a finger along the edge to smooth it out. A damp finger works best
~ I used a damp cloth to wipe off any excess caulking from my finger every couple of feet so I didn’t smear caulking all over the walls.
~ Paint out the paper and the trim. We found using a brush worked best for this project because it gets into the crevasses of the “beadboard”


The cost for the project:

2 rolls of paper at $24.99 each total: 49.98
5 pieces of 7’ long trim at $ 4.79 each total: $23.95
Wallpaper paste $16.95
Paint $42.95 (we bought a gallon but only used about ½ of it)
All other supplies we had left over from previous project.

GRAND TOTAL: $133.83
(plus taxes and stuff of course)


Conclusion

For less than $135 we achieved a look that certainly would have cost more – an 8’ sheet of beadboard alone is about $15. This is an excellent alternative to the real thing. It was not a time consuming project (about 1 day + painting time)
Would I do it again or hire a professional? I would totally do this again. If this was the look I was trying to achieve, it is too simple NOT to diy.

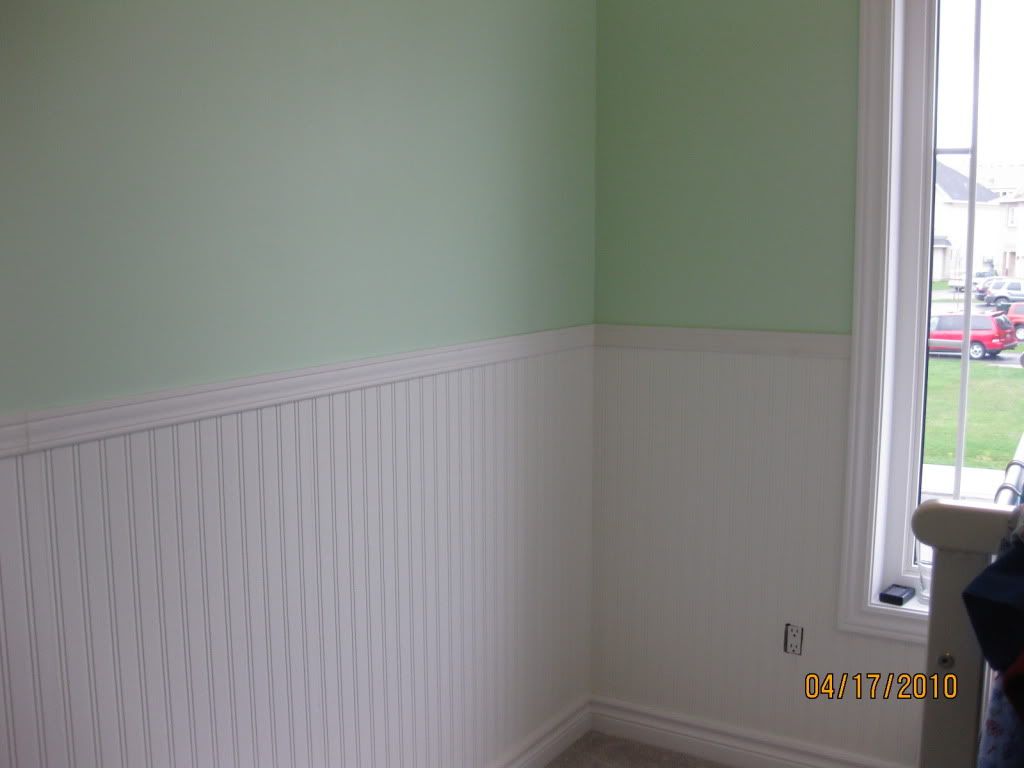
Welcome to the family Baby R!!!! We hope you enjoy your new room:


The paper is up! Now time for the trim work…

Photobucket

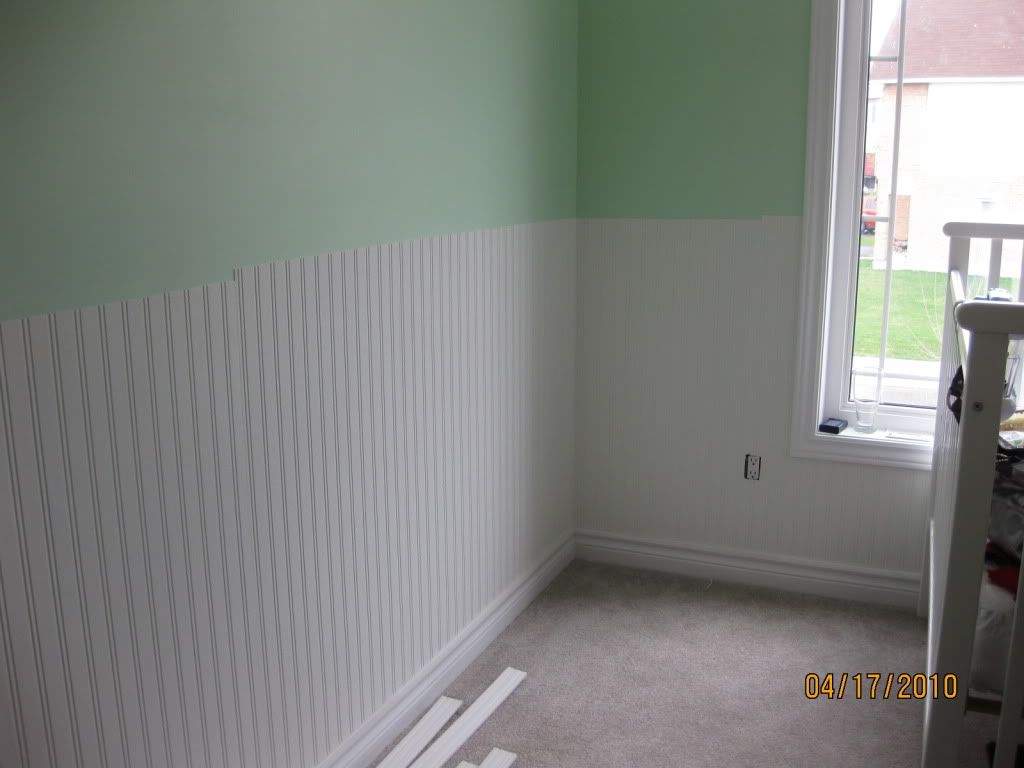
Just needs some paint!
Photobucket